Homemade Reese’s Cups with Sea Salt
Highlighted under: Homemade Dessert Favorites
I always dreamed of replicating the deliciousness of store-bought Reese’s Cups, but with a personal touch. These Homemade Reese’s Cups with Sea Salt not only satisfy that craving but elevate the experience with a sprinkle of sea salt that balances the sweetness of the chocolate and peanut butter perfectly. Making these treats from scratch is simpler than I ever imagined, and they are so much fresher compared to their packaged counterparts. Plus, I can adjust the sweetness to my liking, making them a truly indulgent yet customizable delight.
Creating these Homemade Reese’s Cups was a fun project that transformed my kitchen into a little candy factory. I initially experimented with different kinds of chocolate, settling on a rich dark chocolate that brings out the flavors beautifully. The joy of unwrapping one of these homemade treats is like rediscovering a childhood favorite, but even better because of the quality ingredients and the perfect sea salt finish.
One tip I learned is to ensure your chocolate is tempered properly, which really enhances the final texture. The added sea salt creates a lovely contrast, taking a simple recipe to an extraordinary level. Each bite is a perfect balance of sweet and salty, making it hard to resist just one!
Why You Will Love This Recipe
- Rich chocolate flavor paired with fresh peanut butter
- Creamy texture that melts in your mouth
- Perfectly balanced with a touch of sea salt
The Importance of Ingredient Quality
Using high-quality chocolate is crucial for achieving the rich flavor of your Homemade Reese's Cups. I recommend selecting premium dark chocolate chips with at least 60% cacao content, as this will provide a deeper, richer flavor compared to standard varieties. For the milk chocolate, choose ones that contain real cocoa butter rather than vegetable fats to ensure a smooth melting experience and superior taste. Your choice of chocolate directly impacts both the texture and taste, making it worth the investment.
When it comes to peanut butter, opting for creamy natural peanut butter without added sugars and oils makes a significant difference in taste and texture. The natural oils in real peanut butter contribute to a richer flavor and perfectly creamy mouthfeel. If you're looking for a lower-sugar alternative, try substituting the powdered sugar with a sugar substitute like erythritol or coconut sugar, keeping in mind that this may slightly alter the final texture.
Perfecting the Assembly Technique
For optimal assembly, ensure the melted chocolate is warm but not scorching hot when pouring it into the muffin tin. If it's too hot, it can cause the peanut butter layer to melt, leading to a less-defined layer structure. Aim for a temperature where the chocolate is shiny and pourable, around 90°F to 95°F, after microwaving in 30-second intervals. This temperature allows for smooth application without compromising the filling's integrity.
A small scoop of peanut butter filling should be about 1 tablespoon, providing the right amount to balance the chocolate layers. When layering, be careful not to overfill the liners; leaving some space at the top ensures the chocolate can seal the cups. Tapping the tin gently on the counter before chilling not only settles the layers but helps avoid air bubbles, resulting in a denser, more cohesive candy.
Storage and Serving Suggestions
After the cups have set and the chocolate has firmed up, store them in an airtight container in the refrigerator. They can last up to a week, but I find they’re best enjoyed within the first few days for maximum freshness. If you want to freeze them for longer storage, simply place the cups in a single layer in a freezer-safe bag or container. They can be frozen for up to three months; just remember to let them thaw in the refrigerator before enjoying them again.
For a special touch when serving, consider drizzling some melted chocolate over the tops or experimenting with different types of sea salt, such as smoked salt for an extra layer of flavor. These cups are also delightful alongside a glass of cold milk or a scoop of vanilla ice cream for a truly indulgent treat. You can also customize the filling by adding crushed nuts or a sprinkle of cinnamon for a different twist!
Ingredients
Gather these ingredients before you start:
Ingredients
- 1 cup creamy peanut butter
- 1 cup powdered sugar
- 2 cups dark chocolate chips
- 1/2 cup milk chocolate chips
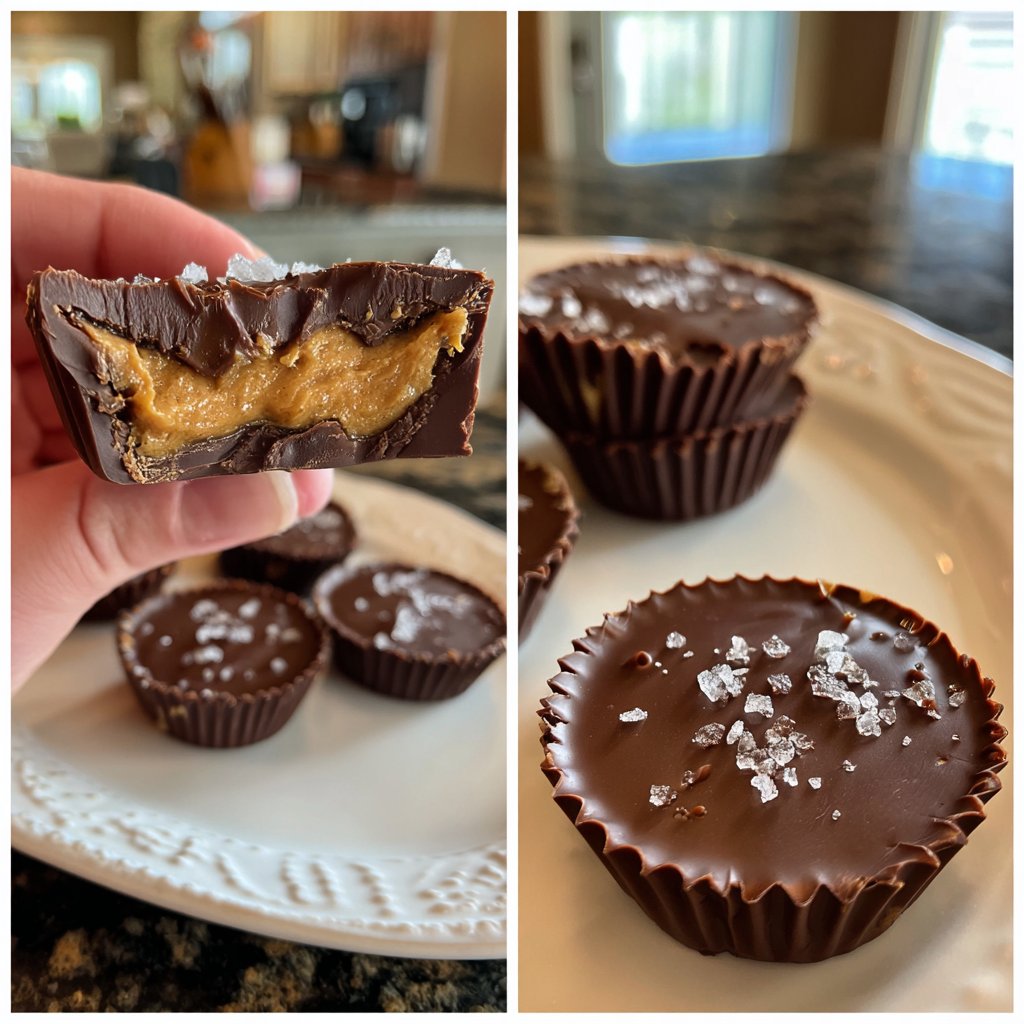
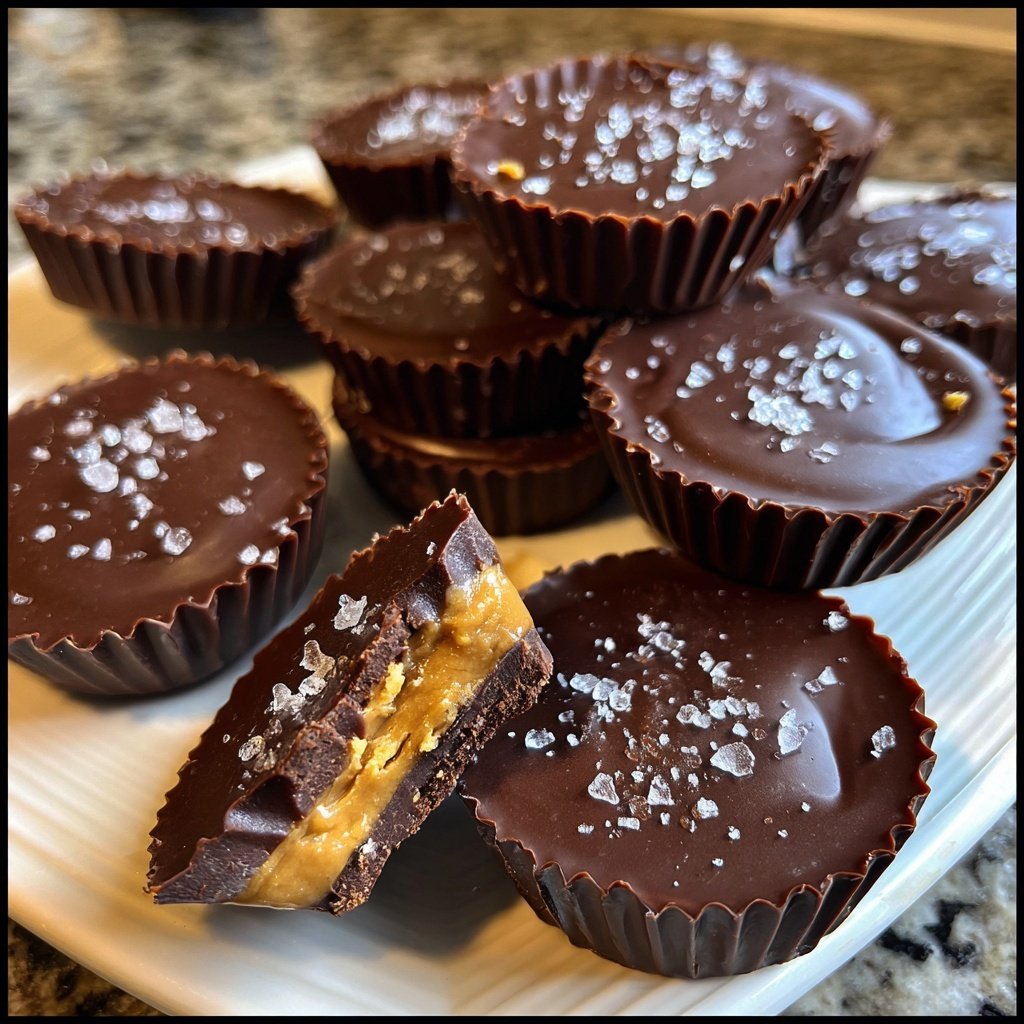
- Sea salt for topping
Make sure all ingredients are at room temperature for best results.
Instructions
Here's how to make your Homemade Reese’s Cups:
Prepare the Peanut Butter Filling
In a bowl, combine the creamy peanut butter and powdered sugar until smooth. Set aside.
Melt the Chocolate
In a microwave-safe bowl, melt the dark and milk chocolate chips in 30-second intervals, stirring until fully melted and smooth.
Assemble the Cups
Line a muffin tin with cupcake liners. Pour a small amount of melted chocolate into each liner, just enough to cover the bottom. Add a scoop of peanut butter filling on top, then cover with more melted chocolate. Tap the tin to settle everything.
Chill and Add Sea Salt
Refrigerate the cups for about 15 minutes until firm. Before serving, sprinkle a pinch of sea salt on top of each cup for that perfect salty-sweet contrast.
Once set, peel away the liners and enjoy your delightful homemade treats!
Pro Tips
- For an extra twist, consider adding mini chocolate chips or chopped nuts to the peanut butter filling for added texture.
Troubleshooting Common Issues
If your chocolate starts to seize while melting, typically due to contact with moisture, avoid panic! You can smoothly recover it by adding a teaspoon of coconut oil or vegetable oil to the melted chocolate. This will help loosen the texture and bring back its glossy finish, allowing you to continue with the recipe.
Should the chocolate not completely harden after chilling, it might have been too warm when poured or the layer was too thick. In such cases, try placing them in the freezer for 10-15 minutes to help solidify the layers more rapidly. Just keep an eye on them to avoid any freezer burn.
Variations to Try
For a variation on the classic flavor, consider adding different nut butters like almond or cashew butter into your filling for an exciting twist. You can also fold in some mini chocolate chips into the peanut butter layer for added texture and a chocolate surprise in every bite.
If you want to make the recipe more festive or seasonal, you can add spices like pumpkin spice during fall or crushed peppermint candies during the winter holidays. Mixing in flaked sea salt with herbs like rosemary can also elevate your cups to gourmet levels, providing a unique sweet and savory experience.
Questions About Recipes
→ Can I use natural peanut butter?
Yes, but it may alter the texture slightly as natural peanut butter can be more runny.
→ How long can I store these cups?
They can be stored in an airtight container in the refrigerator for up to two weeks.
→ Can I use different types of chocolate?
Absolutely! You can substitute milk chocolate or even white chocolate, depending on your preference.
→ Is there a vegan alternative?
Yes, you can use dairy-free chocolate chips and natural peanut butter for a vegan version.
Homemade Reese’s Cups with Sea Salt
Created by: Morgan Reeves
Recipe Type: Homemade Dessert Favorites
Skill Level: Easy
Final Quantity: 12 cups
What You'll Need
Ingredients
- 1 cup creamy peanut butter
- 1 cup powdered sugar
- 2 cups dark chocolate chips
- 1/2 cup milk chocolate chips
- Sea salt for topping
How-To Steps
In a bowl, combine the creamy peanut butter and powdered sugar until smooth. Set aside.
In a microwave-safe bowl, melt the dark and milk chocolate chips in 30-second intervals, stirring until fully melted and smooth.
Line a muffin tin with cupcake liners. Pour a small amount of melted chocolate into each liner, just enough to cover the bottom. Add a scoop of peanut butter filling on top, then cover with more melted chocolate. Tap the tin to settle everything.
Refrigerate the cups for about 15 minutes until firm. Before serving, sprinkle a pinch of sea salt on top of each cup for that perfect salty-sweet contrast.
Extra Tips
- For an extra twist, consider adding mini chocolate chips or chopped nuts to the peanut butter filling for added texture.
Nutritional Breakdown (Per Serving)
- Calories: 380 kcal
- Total Fat: 26g
- Saturated Fat: 15g
- Cholesterol: 195mg
- Sodium: 85mg
- Total Carbohydrates: 32g
- Dietary Fiber: 3g
- Sugars: 24g
- Protein: 6g