Mini Heart Cake with Red Velvet
Highlighted under: Homemade Dessert Favorites
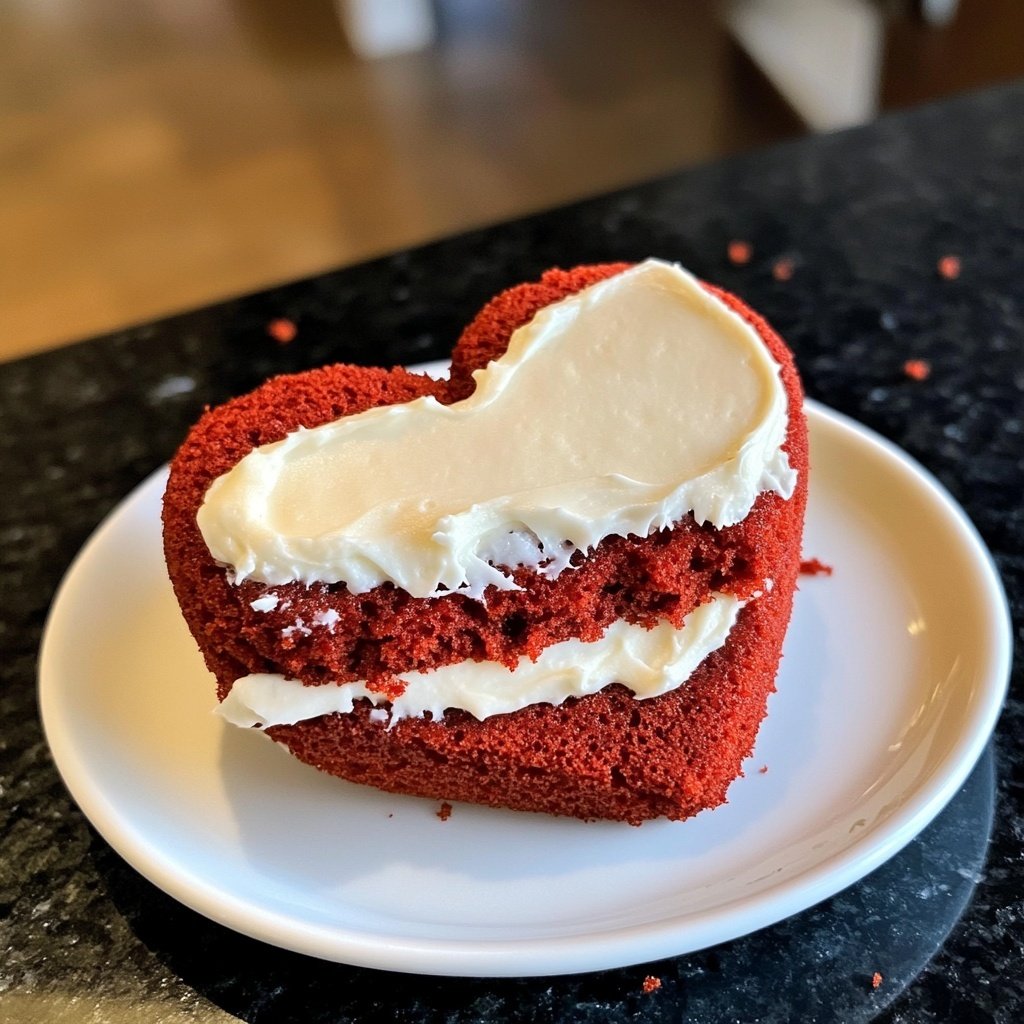
I absolutely adore making these Mini Heart Cakes with Red Velvet! The rich, velvety texture combined with the bright red color makes them perfect for any special occasion. Whenever I want to impress someone, these cakes steal the show. The combination of cocoa and buttermilk creates a moist crumb, while the cream cheese frosting adds a delightful tang. The heart shape adds a charming touch that I simply can't resist. I love how these tiny cakes encapsulate love in each bite!
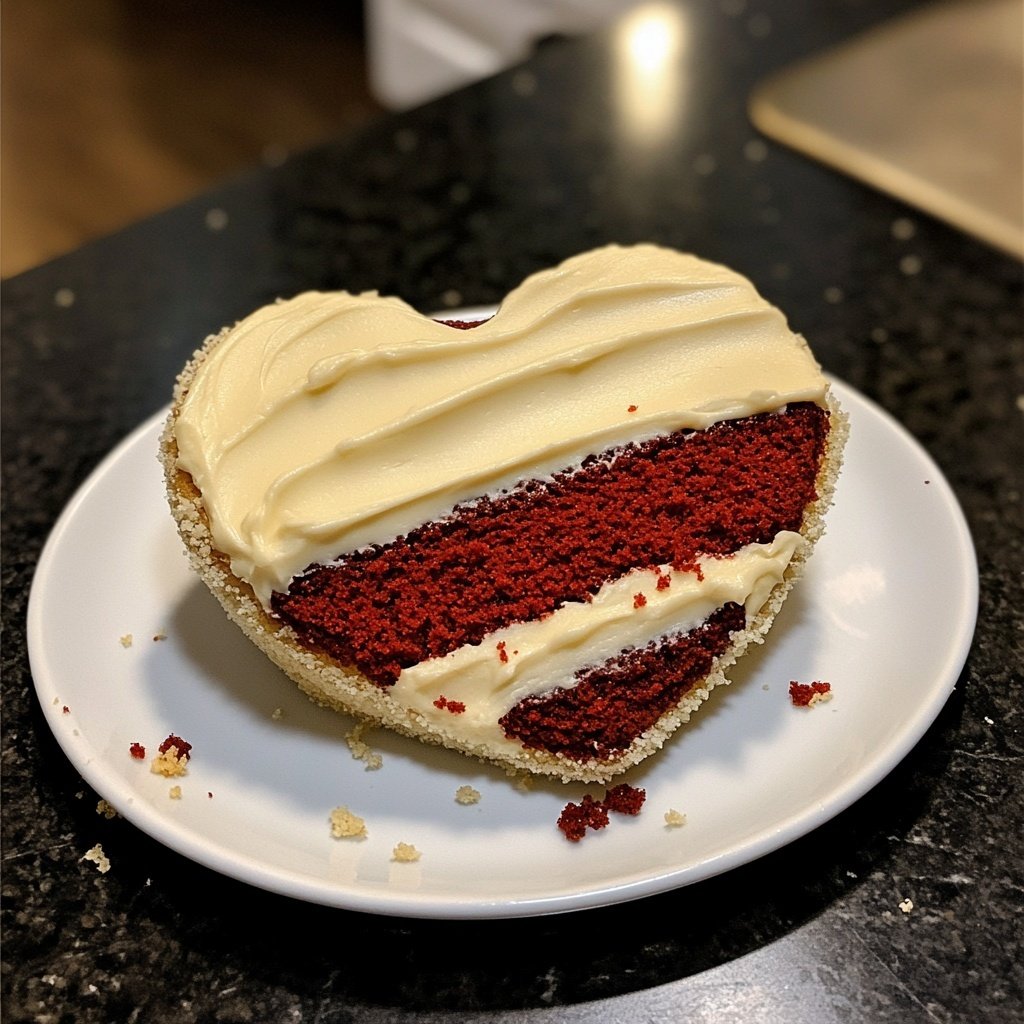
After experimenting with various recipes, I finally found the perfect method for my Mini Heart Cakes with Red Velvet. The secret lies in using buttermilk, which not only adds a subtle tang but also makes the cake incredibly moist. During one of my baking sessions, I realized that letting the cakes cool for just the right amount of time before frosting prevents the cream cheese from melting too quickly, allowing for beautifully defined layers.
I also love how you can customize these cakes for different occasions! For birthdays, I add colorful sprinkles; for Valentine’s Day, I opt for heart-shaped decorations. Each mini cake becomes a personal work of art, making every celebration feel extra special. Remember to chill the frosting slightly before spreading it to achieve that perfect texture!
Why You'll Love This Recipe
- Rich chocolate flavor paired with fresh orange zest
- Creamy texture that melts in your mouth
- Perfect for celebrations or as a sweet indulgence
Understanding the Ingredients
The key to achieving the signature rich flavor of the Mini Heart Cakes lies in the combination of cocoa powder and buttermilk. The buttermilk not only adds moisture but also reacts with the baking soda to create a tender crumb. If you’re out of buttermilk, a quick substitute can be made by adding a tablespoon of vinegar or lemon juice to a cup of milk and letting it sit for about five minutes before using it in the recipe.
The use of vegetable oil as opposed to butter lends a different texture to these cakes, keeping them moist and fluffy. Oil-based cakes typically result in a softer crumb compared to butter-based cakes, which is essential for the velvety mouthfeel. Ensure all your ingredients are at room temperature for optimal blending, particularly the eggs and buttermilk, as this helps to emulsify the mixture effortlessly.
Mastering the Baking Process
When baking the cakes, dividing the batter evenly among the mini heart-shaped pans is crucial for uniform baking. This ensures that all cakes bake at the same rate, preventing some from potentially drying out or others being undercooked. Keep an eye on the baking time, checking for doneness around the 20-minute mark. The cakes should spring back when gently touched and a toothpick should come out clean when inserted in the center.
Once baked, it’s important to cool the cakes properly to prevent them from becoming soggy. Allowing them to cool in the pans for about 10 minutes before transferring them to wire racks helps them set, preventing potential breakage. I recommend placing a piece of parchment paper at the bottom of your pans for easier removal, which can make frosting much simpler too!
Ingredients
Here's what you'll need to make your Mini Heart Cakes with Red Velvet:
For the cakes
- 1 1/4 cups all-purpose flour
- 1 cup granulated sugar
- 1/2 cup unsweetened cocoa powder
- 1 teaspoon baking soda
- 1/2 teaspoon salt
- 1 cup vegetable oil
- 1 cup buttermilk, room temperature
- 2 large eggs, room temperature
- 2 tablespoons red food coloring
- 1 teaspoon vanilla extract
- 1 teaspoon white vinegar
For the cream cheese frosting
- 8 oz cream cheese, softened
- 1/2 cup unsalted butter, softened
- 4 cups powdered sugar
- 1 teaspoon vanilla extract
- 1-2 tablespoons milk (if needed for consistency)
Make sure you have all your ingredients measured and ready!
Instructions
Now, let’s get started with the baking process!
Preheat the Oven
Preheat your oven to 350°F (175°C) and grease mini heart-shaped cake pans.
Mix Dry Ingredients
In a large bowl, sift together the flour, sugar, cocoa powder, baking soda, and salt.
Combine Wet Ingredients
In another bowl, whisk together the oil, buttermilk, eggs, red food coloring, vanilla extract, and vinegar until smooth.
Combine Mixtures
Pour the wet mixture into the dry ingredients and mix until just combined. Avoid overmixing.
Bake the Cakes
Divide the batter evenly between the prepared pans and bake for 20-25 minutes, or until a toothpick inserted in the center comes out clean.
Cool the Cakes
Remove the cakes from the oven and let them cool in the pans for 10 minutes before transferring to wire racks to cool completely.
Prepare the Frosting
In a bowl, beat the softened cream cheese and butter together until creamy. Gradually add powdered sugar and vanilla extract, mixing until smooth. If the frosting is too thick, add milk a tablespoon at a time.
Frost the Cakes
Once the cakes are completely cool, spread the frosting generously on each layer and top with additional decorations if desired.
Serve and Enjoy
Serve your beautiful Mini Heart Cakes and watch them disappear in no time!
Don’t forget to personalize your cakes with your favorite toppings!
Pro Tips
- For an extra pop of flavor, consider adding a splash of orange zest to the frosting or using fruit preserves between layers.
Frosting Tips
For the cream cheese frosting, achieving the right consistency is essential for an even spread. When blending the softened cream cheese and butter, aim for a creamy mixture without lumps. Gradually incorporating the powdered sugar helps in controlling the thickness; if you find it too thick, add a tablespoon of milk to loosen it. The frosting should be smooth and spreadable but not runny to maintain form when layered between the cakes.
Consider using a piping bag fitted with a decorative tip for a more refined finish if you're looking to elevate the presentation of your cakes. Swirling the frosting on top and around the sides adds a beautiful touch, especially when garnished with sprinkles or fresh berries. Experiment with colors in your frosting using food coloring to match themes or special occasions.
Serving and Storage Suggestions
These Mini Heart Cakes can be prepared a day in advance, making them ideal for parties or special celebrations. Store them in an airtight container in the refrigerator after frosting to prevent the cream cheese from softening too much. If you want to serve them later, consider freezing the un-frosted cake layers. Wrap them tightly in plastic wrap and foil, and they can last up to three months in the freezer without losing flavor.
Serving the cakes is as fun as making them! Present them on a decorative platter with a sprinkle of powdered sugar or fresh fruits like raspberries for a pop of color. You can also serve them with a drizzling of chocolate sauce for an extra indulgence. For a more festive touch, consider adding themed decorations that match special occasions such as Valentine’s Day or anniversaries.
Questions About Recipes
→ Can I use a different type of food coloring?
Yes, you can use gel food coloring for a more vibrant color without adding too much liquid.
→ How should I store the mini cakes?
Store the cakes in an airtight container in the refrigerator for up to 3 days.
→ Can I make the cakes ahead of time?
Absolutely! You can bake the cakes a day in advance and frost them closer to serving time.
→ What can I substitute for buttermilk?
You can make a buttermilk substitute by adding 1 tablespoon of vinegar to 1 cup of milk and letting it sit for 5 minutes.
Mini Heart Cake with Red Velvet
Created by: Morgan Reeves
Recipe Type: Homemade Dessert Favorites
Skill Level: Intermediate
Final Quantity: 6 mini cakes
What You'll Need
For the cakes
- 1 1/4 cups all-purpose flour
- 1 cup granulated sugar
- 1/2 cup unsweetened cocoa powder
- 1 teaspoon baking soda
- 1/2 teaspoon salt
- 1 cup vegetable oil
- 1 cup buttermilk, room temperature
- 2 large eggs, room temperature
- 2 tablespoons red food coloring
- 1 teaspoon vanilla extract
- 1 teaspoon white vinegar
For the cream cheese frosting
- 8 oz cream cheese, softened
- 1/2 cup unsalted butter, softened
- 4 cups powdered sugar
- 1 teaspoon vanilla extract
- 1-2 tablespoons milk (if needed for consistency)
How-To Steps
Preheat your oven to 350°F (175°C) and grease mini heart-shaped cake pans.
In a large bowl, sift together the flour, sugar, cocoa powder, baking soda, and salt.
In another bowl, whisk together the oil, buttermilk, eggs, red food coloring, vanilla extract, and vinegar until smooth.
Pour the wet mixture into the dry ingredients and mix until just combined. Avoid overmixing.
Divide the batter evenly between the prepared pans and bake for 20-25 minutes, or until a toothpick inserted in the center comes out clean.
Remove the cakes from the oven and let them cool in the pans for 10 minutes before transferring to wire racks to cool completely.
In a bowl, beat the softened cream cheese and butter together until creamy. Gradually add powdered sugar and vanilla extract, mixing until smooth. If the frosting is too thick, add milk a tablespoon at a time.
Once the cakes are completely cool, spread the frosting generously on each layer and top with additional decorations if desired.
Serve your beautiful Mini Heart Cakes and watch them disappear in no time!
Extra Tips
- For an extra pop of flavor, consider adding a splash of orange zest to the frosting or using fruit preserves between layers.
Nutritional Breakdown (Per Serving)
- Calories: 300 kcal
- Total Fat: 18g
- Saturated Fat: 10g
- Cholesterol: 80mg
- Sodium: 205mg
- Total Carbohydrates: 34g
- Dietary Fiber: 1g
- Sugars: 24g
- Protein: 3g