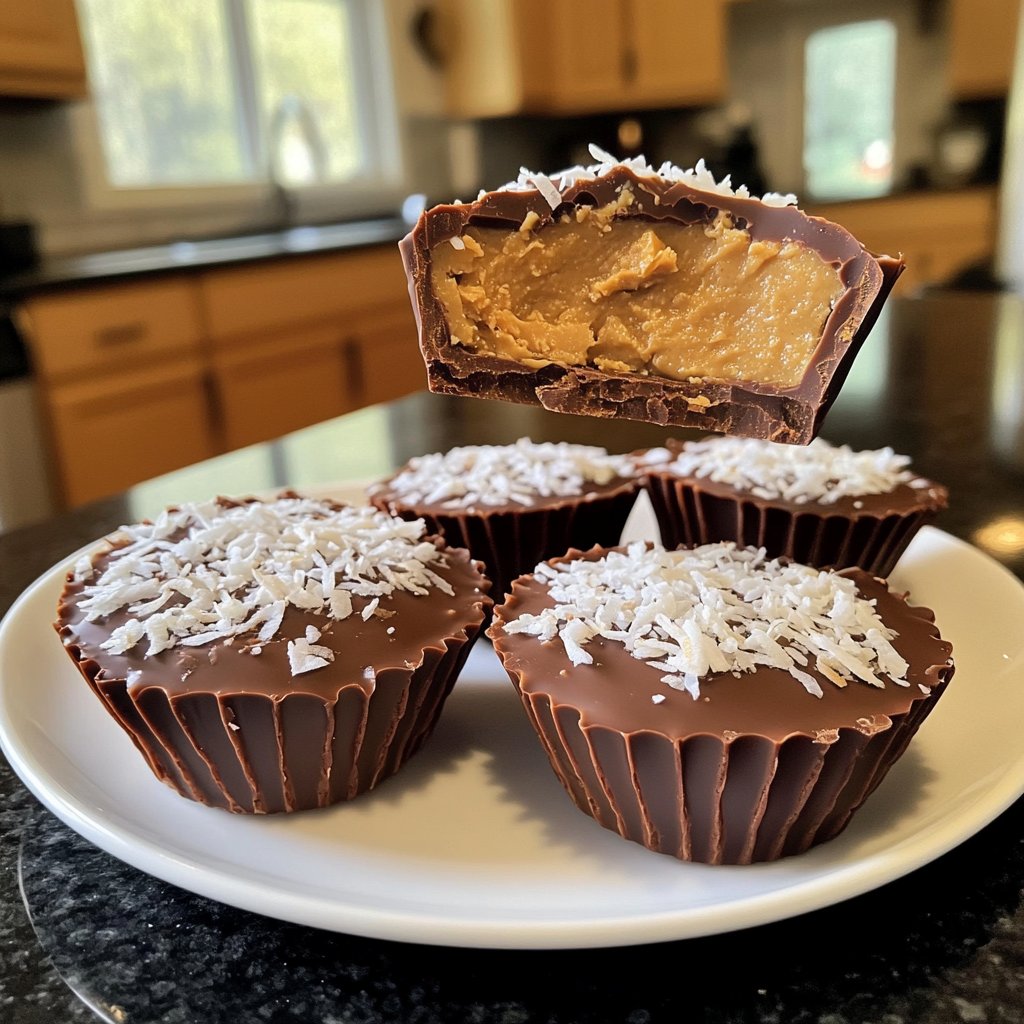
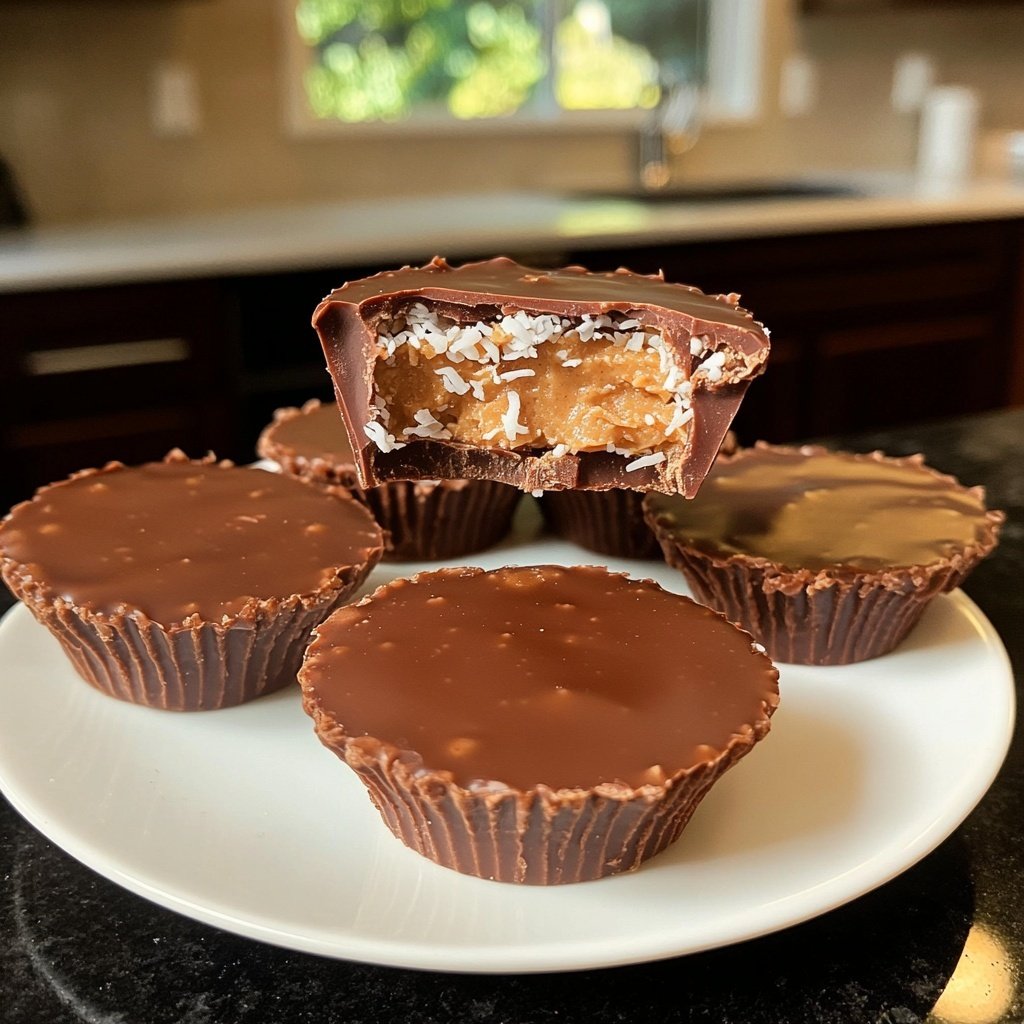
Homemade Peanut Butter Cups with Coconut
Highlighted under: Homemade Dessert Favorites
When I first set out to create my own peanut butter cups, I couldn't have imagined how satisfying the process would be. I love how I can control the sweetness and incorporate coconut for an added twist. These cups are not only a delicious treat but also a healthier alternative to store-bought options. The combination of creamy peanut butter, rich chocolate, and the subtle crunch of coconut creates a delightful bite that’s hard to resist. With just a few simple ingredients, I’m always excited to whip up a batch and share them with friends and family.
Making these homemade peanut butter cups has become a delightful ritual in my kitchen. I remember the first batch I made was a bit too sweet, but adjusting the sugar content really transformed the flavor balance. The magic happens when you let the chocolate set just right, allowing the coconut to add just the right amount of texture. I've found that using high-quality chocolate makes all the difference; it melts beautifully and enhances the overall taste.
Another tip I've learned over time is to use a mini muffin pan for perfect portions. This not only makes them easier to eat but also helps with the layering of chocolate and peanut butter. Remember to let them chill thoroughly before taking them out; a little patience goes a long way in getting that perfect snap when you bite in!
Why You'll Love These Peanut Butter Cups
- Decadent peanut butter filling that’s creamy and satisfying
- Rich chocolate coating provides a perfect balance of sweetness
- Coconut adds a delightful crunch and tropical twist
The Importance of Quality Chocolate
Choosing the right chocolate is crucial to achieving the perfect flavor and texture in your peanut butter cups. I recommend using high-quality dark chocolate with at least 60% cocoa content to ensure a rich flavor that balances well with the sweetness of the peanut butter and sugar. If you prefer a less intense chocolate taste, you can opt for milk chocolate, but be mindful that it will alter the overall sweetness of the cups.
When melting chocolate, be aware of the temperatures involved. Overheating chocolate can cause it to seize, turning it grainy and unusable. If you find your chocolate is thickening rather than smoothing out, a splash of coconut oil can help restore its glossy consistency, allowing it to coat the cups evenly.
Perfecting Your Peanut Butter Filling
The peanut butter filling is where you can really customize your cups. I like to use creamy peanut butter for a smooth texture, but if you enjoy a bit more crunch, you can substitute with crunchy peanut butter. Just keep in mind that it may affect the final texture; you want it creamy enough to hold its shape without being too dry or crumbly.
Adding shredded coconut enhances the flavor and gives an appealing texture contrast. If you're looking to reduce sugar in your diet, consider using a natural sweetener like honey or maple syrup in place of powdered sugar. However, you'll want to adjust the consistency of your filling by using slightly less peanut butter, as these sweeteners can add extra moisture.
Storage and Serving Suggestions
After chilling your homemade peanut butter cups, they can be stored in an airtight container in the refrigerator for up to two weeks. If you want to keep them longer, consider freezing them. Just layer them between sheets of parchment paper to prevent sticking and place them in a freezer-safe container. They can last for up to three months in the freezer—perfect for having a sweet treat on hand at all times.
For serving, these cups can be dressed up for special occasions. Drizzling melted chocolate or a sprinkle of sea salt on top just before serving can elevate their appearance and flavor. If you're feeling adventurous, try experimenting with different nut butters or adding a touch of espresso powder to the chocolate mixture for a coffee-infused twist!
Ingredients
For the Cups
- 1 cup dark chocolate chips
- 1 cup creamy peanut butter
- 1/4 cup shredded coconut
- 1/4 cup powdered sugar
- 1 teaspoon vanilla extract
- 1/4 teaspoon salt
Mix all the ingredients thoroughly before assembling the cups.
Instructions
Melt the Chocolate
In a microwave-safe bowl, melt the dark chocolate chips in 30-second intervals, stirring in between until smooth.
Prepare the Muffin Tin
Line a mini muffin tin with cupcake liners. Spoon a small amount of melted chocolate into each liner, just enough to coat the bottom.
Make the Filling
In a separate bowl, mix the peanut butter, shredded coconut, powdered sugar, vanilla extract, and salt until combined.
Assemble the Cups
Once the chocolate layer has set slightly, add a generous dollop of peanut butter filling to each cup, then top with more melted chocolate to seal.
Chill and Serve
Place the muffin tin in the refrigerator for about 20 minutes, or until the chocolate has fully set. Enjoy your homemade treats!
Store any leftovers in an airtight container in the fridge.
Pro Tips
- Using a combination of dark and milk chocolate can balance sweetness to your preference.
Troubleshooting Common Issues
If you find that your chocolate is not setting properly, ensure that you've tempered it correctly during melting. If the chocolate layer remains too thin after applying it in the muffin tin, pour a little more melted chocolate over the top to create a thicker shell. A thicker layer not only adds to the visual appeal but also enhances the taste experience as you bite into the cup.
Another common issue is the filling oozing out when you bite into the cups. To prevent this, make sure the chocolate layer has set sufficiently before adding the peanut butter filling. A good rule of thumb is to let the first layer chill until it's firm to the touch, which usually takes about 15–20 minutes.
Variations to Explore
Feel free to experiment with additional mix-ins or toppings to personalize your peanut butter cups! You might try adding crushed nuts like almonds or walnuts to the peanut butter mixture for added texture and health benefits. Alternatively, consider incorporating a sprinkle of flaky sea salt on top to enhance the chocolate flavor and add an intriguing contrast with the sweetness.
If you're looking for a fun seasonal twist, try infusing your peanut butter with pumpkin spice or holiday flavors like peppermint extract. These variations could make the cups a delightful addition to your seasonal dessert table, providing something unique that your guests won't soon forget.
Questions About Recipes
→ Can I use almond butter instead of peanut butter?
Absolutely! Almond butter works well and adds a unique flavor.
→ How do I store the peanut butter cups?
Store them in an airtight container in the fridge for up to 2 weeks.
→ Can I use less sugar?
Yes, feel free to adjust the powdered sugar to your taste.
→ What other toppings can I add?
You can experiment with crushed nuts, sea salt, or even a drizzle of caramel on top.
Homemade Peanut Butter Cups with Coconut
Created by: Morgan Reeves
Recipe Type: Homemade Dessert Favorites
Skill Level: Easy
Final Quantity: 12 pieces
What You'll Need
For the Cups
- 1 cup dark chocolate chips
- 1 cup creamy peanut butter
- 1/4 cup shredded coconut
- 1/4 cup powdered sugar
- 1 teaspoon vanilla extract
- 1/4 teaspoon salt
How-To Steps
In a microwave-safe bowl, melt the dark chocolate chips in 30-second intervals, stirring in between until smooth.
Line a mini muffin tin with cupcake liners. Spoon a small amount of melted chocolate into each liner, just enough to coat the bottom.
In a separate bowl, mix the peanut butter, shredded coconut, powdered sugar, vanilla extract, and salt until combined.
Once the chocolate layer has set slightly, add a generous dollop of peanut butter filling to each cup, then top with more melted chocolate to seal.
Place the muffin tin in the refrigerator for about 20 minutes, or until the chocolate has fully set. Enjoy your homemade treats!
Extra Tips
- Using a combination of dark and milk chocolate can balance sweetness to your preference.
Nutritional Breakdown (Per Serving)
- Calories: 180 kcal
- Total Fat: 12g
- Saturated Fat: 4g
- Cholesterol: 0mg
- Sodium: 80mg
- Total Carbohydrates: 15g
- Dietary Fiber: 1g
- Sugars: 8g
- Protein: 3g